Dealing with clogged printheads? If you've been googling solutions, you've probably come across ultrasonic cleaners as a potential fix. While these devices can work wonders on jewelry and tools, using them on print heads is a different story. Let's talk about whether it's actually a good idea for your printer.
Can you put printheads in an ultrasonic cleaner? In this guide, we'll cover everything you need to know:
- Will an ultrasonic cleaner actually fix your printhead issues? (Spoiler: it can, but there's more to it)
- How to safely clean printheads in an ultrasonic cleaner - step by step
- What to watch out for to keep your printer safe
- Other cleaning methods that might work better for your situation
Can You Actually Use an Ultrasonic Cleaner for Printheads?
Yes, ultrasonic cleaners can effectively clean printheads – but success depends on proper technique and careful consideration of specific requirements. While these devices can work wonders on clogged print heads, using them incorrectly could leave you with an expensive paperweight instead of a clean print head.
How Ultrasonic Cleaning Works for Printheads
Think of ultrasonic cleaning as giving your printheads a deep-tissue massage. Ultrasonic cleaners use high-frequency sound waves to create microscopic bubbles that collapse (cavitation), effectively removing debris from tiny nozzles and channels. This process works particularly well because it reaches those microscopic nooks and crannies that traditional cleaning methods can't touch.

(If you want to learn more about how to use an ultrasonic cleaner, you could visit our article as well: "Here's a general guide on how to use an ultrasonic cleaner")
Best Practices for Getting Started
Before you jump in, let's get your workspace ready. Here's what you'll need:
- A professional-grade ultrasonic cleaner (40kHz frequency minimum)
- Manufacturer-approved cleaning solution
- Basic safety gear (gloves and eye protection)
- Clean, lint-free cloths for drying
Ready to clean? Here's your step-by-step guide:
- Fill your ultrasonic cleaner with the right solution
- Set the temperature to a printhead-friendly 25-30°C (77-86°F)
- Place printheads in their holder or basket
- Run a quick 2-3 minute cleaning cycle
- Check your progress
- Give everything a good rinse with distilled water
- Let it dry completely before putting it back to work
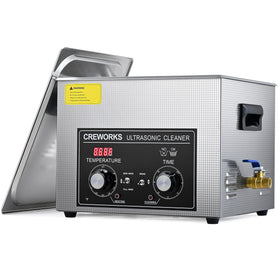
Want professional-grade cleaning without the hassle? Creworks 3L ultrasonic cleaner uses sound waves to deep clean your printheads, jewelry, glasses, and more - no harsh chemicals needed. With adjustable heat settings and a roomy tank, it makes thorough cleaning simple.
Critical Safety Considerations
Before you start cleaning, there are some crucial boxes to tick. You'll want to:
- Check if ultrasonic cleaning affects your warranty
- Verify your printhead's compatibility
- Stick to recommended cleaning times
- Use only solutions that work with your ink type
How to Check Your Print Head Compatibility
Not sure if your printhead can handle ultrasonic cleaning? Here's how to find out:
Check Your Printhead Type:
-
Thermal printheads (commonly used in HP and Canon printers) require extra caution due to their heat-sensitive components
-
Piezoelectric printheads (found in Epson and some professional printers) generally handle ultrasonic cleaning better
- Industrial printheads often come with specific cleaning guidelines in their documentation
Quick Ways to Verify Compatibility:
- Look up your printer's model number in the manufacturer's maintenance guide
- Contact the printhead manufacturer's support team directly
- Check online print forums for experiences with your specific model
- Consult with your printer's authorized service provider
Warning Signs Your Printhead Might Not Be Suitable:
- Built-in electronic circuits directly on the print head
- Manufacturer explicitly warns against liquid immersion
- Warranty card specifically mentions ultrasonic cleaning as prohibited
- Print head is labeled as "sealed unit - do not disassemble"
When to Try Something Else
Sometimes, ultrasonic cleaning isn't your best bet. Consider other options when:
- You're working with newer printheads packed with sensitive electronics
- Your printer uses water-based inks that clean up easily with standard methods
- You've got printheads under warranty
- You're dealing with specialized coating materials

Pro Tips for Better Results
Want to get the most out of your ultrasonic cleaning? Here's what experienced print shops do:
Keep a cleaning schedule:
- Don't wait for complete clogs
- Track your cleaning sessions
- Watch for early warning signs in print quality
Handle your cleaning solution right:
- Change it regularly
- Mix it properly
- Keep the temperature just right
Stay on top of quality:
- Test prints are your friend
- Keep before/after samples
- Document everything (your warranty might thank you later)
Conclusion: Making the Right Choice for Your Print Heads
Let's recap what we've covered:
- Understanding when ultrasonic cleaning makes sense
- Getting the cleaning process right
- Keeping your equipment safe
- Knowing when to try other methods
- Maintaining professional standards
Key points to remember:
- Always check those manufacturer guidelines
- Use the right cleaning solutions
- Follow proper cleaning steps
- Keep detailed records
- Monitor your results
- Know when to call in the pros
While ultrasonic cleaning can be a game-changer for you, it's just one tool in your maintenance toolkit. When in doubt, reach out to a certified technician who knows your specific printer model.
My name is Michael Anderson and I'm a senior engineer who works with heavy tools and equipment. I have a degree in mechanical engineering and have worked on mining and construction jobs all over the world, which has helped me a lot. The goal of my writing is to make complicated technical ideas easy-understanding to a broad audience.


