With over 10000+ orders
With over 10000+ orders
Your transfers keep peeling off after washing. The vinyl isn't sticking properly to the polyester. And those expensive sublimation prints? They're coming out dull and faded. The difference between professional results and costly mistakes often comes down to one thing: using the right heat press temperature settings for your materials.
Before diving into specific techniques, you need to know the right settings for each material. Every fabric has its own "sweet spot" - the perfect combination of temperature, time, and pressure that delivers professional results.
|
Material Type |
Temperature |
Time |
Pressure |
Essential Tips |
|
Cotton Clothing |
320-360°F (160-180°C) |
30s |
High |
Quick hot peel, avoid buttons |
|
Caps/Hats |
330-350°F (180-190°C) |
40s |
Medium |
Keep front taut |
|
Chemical Fiber |
300-320°F (150-160°C) |
20s |
Medium |
Lower temp prevents damage |
|
Pillows |
340°F (190°C) |
50s |
High |
Even pressure distribution |

Cotton remains one of the most popular materials for heat pressing, and for good reason. At 320-360°F (160-180°C) with a 30-second press time, cotton accepts transfers beautifully when handled correctly. The key lies in using AW light heat transfer paper with reverse-printed images. High pressure ensures solid adhesion, but watch out for those plastic buttons – they'll melt if they touch the heated platen.
One pro tip that makes a huge difference: peel that transfer paper off quickly while it's still hot to prevent it from cooling and sticking to your design.
Heat pressing caps requires special attention due to their curved surface. The sweet spot lies between 330-350°F (180-190°C) with a 40-second press time. The trickiest part? Keeping the front panel taut. A wrinkled surface leads to a wrinkled transfer, so take the time to position everything properly.
Medium pressure works best here – too much can distort the cap's shape.
Synthetic fabrics need a gentler touch. At 300-320°F (150-160°C), these materials require less heat than cotton but still deliver excellent results. The shorter 20-second press time protects the fabric while allowing proper adhesion. Medium pressure prevents the material from stretching or warping during the process.
Like with cotton, keep those heat-sensitive components away from the platen.
Pillows present unique challenges due to their thickness. A temperature of 340°F (190°C) with a longer 50-second press time ensures the heat penetrates evenly through the material. High pressure becomes crucial here – you need that solid contact throughout the pressing surface. The thicker material means you might need to adjust your pressure settings more carefully than with standard fabrics.
Regardless of what you're pressing, some universal rules apply:
When sublimation inks transform from solid to gas, they need precise conditions to properly embed themselves within fabric fibers.
This process requires extra heat compared to other printing techniques, which explains why sublimation typically demands more time during the heat transfer process. Think of it as giving the ink enough time to fully infuse into the material rather than just sitting on top.
During the heat press process, several factors work together to create the perfect print. The timer ensures consistent application, while proper pressure maintains even contact between all layers.
This combination of elements - time, temperature, and pressure - creates the foundation for professional-quality results.

Each material brings its own unique challenges to heat pressing. For instance, pillows and home decor items often require extended pressing times of up to 50 seconds at 340°F (190°C). This longer duration ensures the heat penetrates evenly through thicker materials. High pressure becomes crucial here, as these items often have varying thicknesses that need to be compensated for.
As for linen fabric, it responds best to high pressure and proper heat transfer paper selection. The natural fibers in linen can be stubborn, thus it requires careful attention to temperature and time settings. When heat pressing linen, you should ensure non-heat-resistant components stay clear of the heated platen to prevent damage.
|
Material |
Special Considerations |
Common Mistakes |
|
Pillows |
Even pressure distribution |
Insufficient pressing time |
|
Linen |
Heat-resistant components |
Uneven pressure |
|
Hats |
Front panel tension |
Wrinkled results |
When your transfers aren't sticking properly, the issue often traces back to the fundamental relationship between heat and pressure. Temperature acts as the activator, but pressure ensures proper contact throughout the entire design. If you're experiencing peeling edges or incomplete transfers, start by examining your pressure settings before adjusting temperature.
The heating process requires patience and precision. Your heat press machine needs time to reach the proper temperature and maintain it consistently throughout the job. Rushing this process or skipping the preheating step can lead to inconsistent results, even if your temperature settings are technically correct.

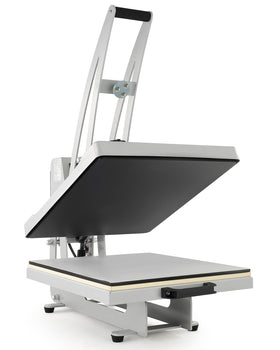
While proper settings are crucial, the right equipment can help avoid many common issues we've discussed. For example, an auto-open heat press machine eliminates the timing guesswork - the platen automatically opens when your timer finishes, preventing over-pressing and potential damage to your materials.
Consider Creworks 16"x20" Auto Open Heat Press Machine if you're looking for more consistent results. Its pull-out bottom platen lets you safely arrange materials away from the heat, while the emergency stop feature provides extra security during pressing.
Pre-pressing is your best friend here. Remove air pockets first, then use a folded towel or pillow insert to create a level surface. Press from center outward with high pressure, but don't strain the machine. A second press after rotating 180° ensures full coverage.
Always use protective paper sheets above and below. Higher temperature is crucial here - it's what turns the ink into gas for proper fabric penetration.
Each material needs its own combination of heat, time, and pressure. Start with our recommended settings, test on scrap material, and keep notes of what works best for your projects.
Remember:
💡 Always start with a test press
💡 Keep detailed notes of successful settings
💡 Maintain your equipment regularly
💡 Follow material-specific guidelines
With these settings and tips in hand, you're ready to create professional-quality transfers every time.


